Friday, April 3, 2015

April News Letter

We just wanted to take a moment and let you know everything that we have going on.

We are getting a great start this Spring. April is opening with Shutterfest, a great event for continuing education in the photographic field. Later this month Brendan is traveling to Tennessee for a week of shooting while Robin is holding down the fort here.

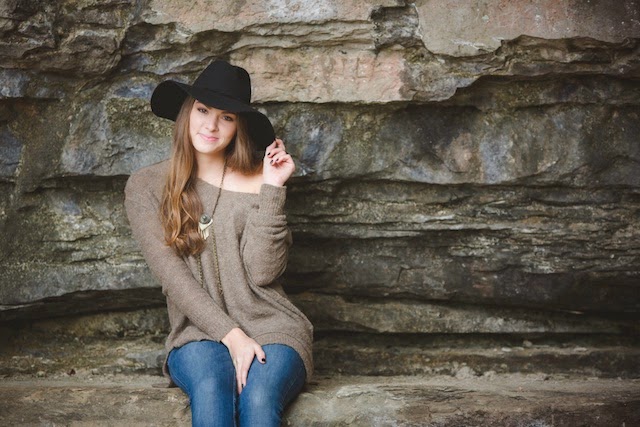
We are also running an Early Bird Special for the class of 2016. Get the jump on your senior portraits and save $75! Call today, there are limited spots available and this promotion ends June 30th.
2016 Senior Portrait Early Bird Special!

Tuesday, February 3, 2015

February News Letter

We just wanted to take a moment and update you on our February schedule. Valentine's Day is fast approaching, but we still have a couple of openings if you are looking for something special to get your romantic partner. We have boudoir shoots starting at $175 we also over several print and album choices.

Spring is just around the corner and with it the beginning of the 2016 Senior portrait season. With this we offer a limited number of ambassador shoots for 2016 high school seniors. This is a great chance to save 50% on the total cost of your senior portrait session.

Brendan is getting ready to travel to Texas for two weeks of shooting in the last half of the month, while Robin is gearing up for wedding season. And of course our big announcement is that we have opened an 800 square foot studio in Lebanon, helping us to meet all of your portrait needs. 2015 is shaping up to be a great year, we can wait to share it with you.


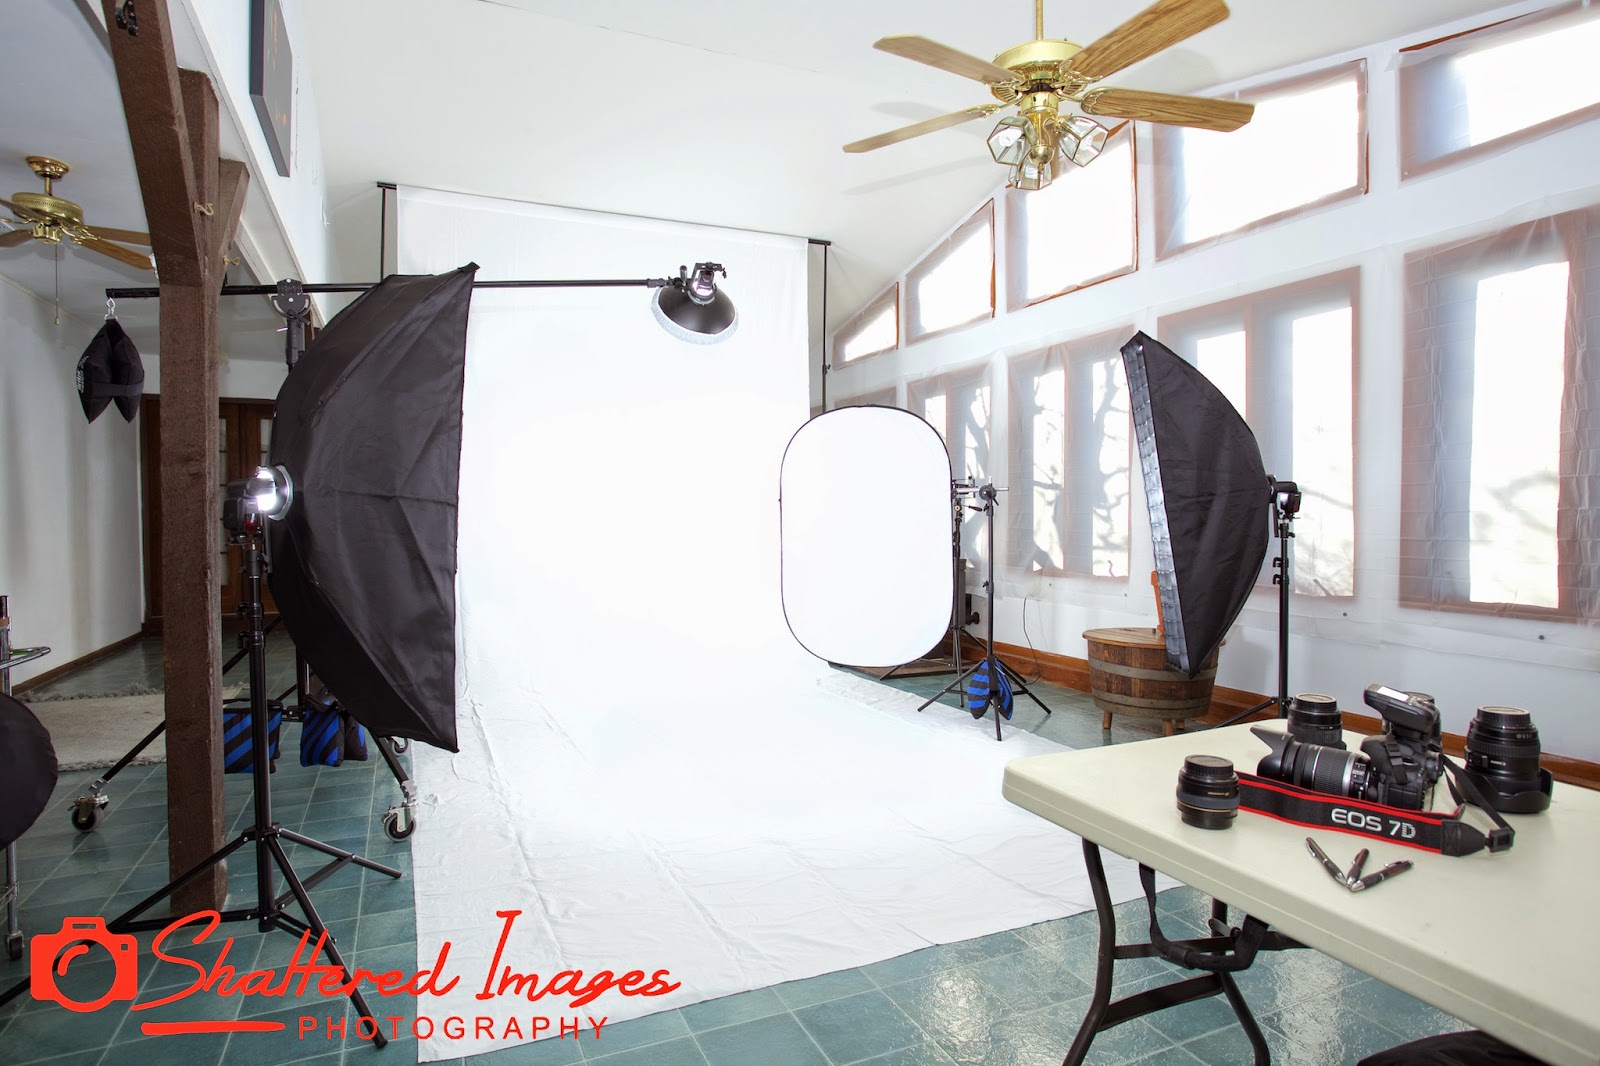
New Studio Space
New Studio Space


Follow Us


Tuesday, January 13, 2015

Our Martial Arts Photo Schedule for Spring 2015

Spring 2015

A big thank you to all of our customers.

We just wanted to let everybody know that our scheduling for 2015 photoshoots is well under way. We already have photos shoots lined up in Texas in February. We will be shooting in Kansas and Nebraska in March and then moving on to Tennessee in April. If you have not booked your shoot yet, don't worry we can still fit your school in, but don't delay we are starting to fill up for this Spring.

In other news we just wanted to let everybody know that if you have been following us on Facebook we now have a Facebook Page dedicated to martial arts photography. Now it is even easier to follow all of the news and photos from you shoots!

Shattered Images Martial Arts Photography


Follow Us


Thursday, January 1, 2015

Happy New Year!

We just wanted to take a moment and wish everybody a happy and prosperous 2015. This New Year also marks five years of business for Shattered Images Photography. Those of you who have been with use a while will have noticed we recently updated our website and letter head, while those updates are cosmetic we are pleased to announce that we are opening 800 sq ft of studio space here in Lebanon making it even easier for us to help you create the exact look you need. This space is perfect for head shots, bridal photos, or creating something sexy for Valentine. While it may seem early to start thinking about Valentine's Day, it is only 6 short weeks away. Let us help you create something memorable for you and your loved one.


Follow Us


Monday, December 1, 2014

December Updates - Cyber Monday.

Cyber Monday Sale, save 35% In December!

We hope everybody and a wonderful Thanksgiving with the family. But now the Christmas season is in full swing. In celebration of the holiday we are taking 25% off of all photo sessions booked in December. This is a great saving that can be used for High School Senior Portraits, an Engagement Photo Session and this is the perfect time to shoot something steamy for your Valentine. We offer a wide array of prints and canvases as well as albums.

In other News:

We will be attending Christmas in the Park in Lebanon held at Archly park on the evening of Friday December 5th from 5-7pm. We hope to see everybody there. It should be a very fun event for the whole family.

And we are very pleased to announce that the work of Brendan Beavers will once again be on display in Art Takes Miami an exhibit of contemporary art sponsored by The Miami Museum of Modern Art and held annually on Miami Beach Each December. "Scarlet Temptation" along with other works will be on display on December 7th. If you find yourself in the Miami area at that time be sure to stop in and check it out.
Scarlet Temptation


Saturday, November 1, 2014

November News Letter

This is shaping up to be a busy Fall. We hope everyone had a wonderful Halloween. Now that Halloween has passed Thanksgiving is fast approaching. For any of you that would like a current family portrait to send with your Christmas cards there is still time, though not much. Be sure to call us this week to schedule an appointment.

Keeping in the spirit of giving we are sponsoring the Hunger Games 450 challenge here in Lebanon on November 8th at Atchly Park. "The Hunger Games 450 Challenge is a 12 event obstacle course hosted by the City of Lebanon Parks and Recreation Department to benefit the L-Life Food Bank." And will be fun for the whole family.

For more info echamberlin@lebanonmo.org
Facebook

We know Black Friday has become a big tradition in this country, however, we are a small business and choose to celebrate the holidays with our friends and families, so we will be closed from the 23rd-30th. We hope you have a great holiday too, remember Friends and family is what it is all about.

Follow Us


Wednesday, October 1, 2014

October News Letter

We had a great turn out at the Lebanon Business Expo and a couple of big winners! Congratulations to Rendell Pickard and Jim Gallaher.

We are looking forward to some more great high school football. Lebanon was in a battle to the finish last Friday night for Homecoming and Camdenton has their Homecoming showdown tonight. It should be an exciting game.

We are pleased to announce that we will have a booth at the Lebanon Art Walk on the 13th of Oct. The art walk is a family friendly event hosted by the Lebanon Art Guild featuring all kinds of local talent. For more information just call the Guild at 417.532.1895.

We have a lot of shooting going on in October with Brendan working at the Fork & Cork on Saturday before traveling to both New York and Colorado. Robin will be spending some time working in Kansas, but we also have several openings here in Missouri and we would love to fit you in.

Follow Us

Monday, September 1, 2014

September News Letter

We just wanted to take a moment and let you know everything that we have going on.

Last Friday we saw a very exciting football game between the Lebanon Yellowjackets and the Waynsville Tigers. This coming Friday we will be traveling to Camdenton to photograph the rivalry between the Jackets and the Lakers. Be sure to check out all of the great photos @Shattered Images Photography. If you are interested in inviting us out to your high school event just let us know and we will try our best to fit your school in!

On September 6th we are hosting a free ice cream social for the LHS class of 2015 from 2-4pm at the Lebanon Art Guild and Gallery @227w Commercial St., Lebanon, MO. Be sure to spread the word to any of the LHS seniors you know. We hope to see you all there. And for our out of town fans, if you happen to be in town be sure to stop in and say hi.

Senior Portrait season is in full swing. We still have a few openings however our schedule is filling up fast, so don't delay. Both Brendan and Robin still have openings, but they are both looking at a busy September and October.

We will also have a booth in the Lebanon Business Expo at the Lebanon Civic Center this September 13th. Be sure to stop by and say hello. Also be sure to tell any brides you know that we will be giving away a free engagement session photo shoot that day at the Expo. They will want to be sure to stop in and sign up!

That wraps things up for us. I don't know about the rest of you but we can't wait to see all of the Autumn colors. Have a Happy Labor Day and we will see you soon.

Follow Us


Wednesday, August 6, 2014

7 Tips for Great Wedding Photos

When planning a wedding there are three large expenses that can really make or break the day. The first is your venue and other than making it fit your budget, and being sure it can accommodate your guest list, fit your time frame and compliments your style, there is not much to think about. The second one is catering. Remember, this will include both the food and the drinks, has to accommodate differing dietary needs, (think vegan or gluten free options) and has to be delivered in a timely fashion to a large group. The last big expense is photography. Wedding planners generally advise couples to plan to spend about ten percent of their total budget on a specialized professional photographer. Photography may not seem that important when selecting a wedding gown, hiring caterers, arranging seating, guest lists, electing brides maids and groomsmen… but when it is all said and done you are going to take three things away from that day. While your marriage will flourish your memories of that day will fade - it takes a skilled professional to capture those moments otherwise they will be lost “like tears in rain”.


1) Do not let someone else choose your photographer. - This does not seem like something that would have to be mentioned, but in the chaos of planning a wedding it can be easy to let details slide. When dealing with budgets and limited time it can be easy to let a family member start making decisions, especially if they are paying. Be sure to stay involved in this process. Have them bring you 3-4 choices, take the time to look them over then sit down with said family member and discuss what works and what does not. Be sure that you are going to end up with a photographer that is qualified and whose work will represent you and compliment your sense of being.


2) Be sure you are making an apples to apples comparison between photographers. - This seems like it should be an easy thing to do, but there is no standard in pricing for photography. When discussing costs with a photographer it is important to know whether the cost they mention is just a creative shooting fee. Does their cost include prints? Just being handed a cd of all the images can seem like a good deal, but where do you get them  printed? How do you go about getting an album? When they quote you a price does that include image retouching? You will want these questions answered before you decide. How much of the ceremony is covered in their quote? What type of products are included? Is retouching included? What guarantees do they have that the photographer will be available…


3) Do not sign any contracts without experiencing their work. - With so many things to plan for it can be easy to look at someones portfolio and think wow, lets hire them and have this settled. Don’t do it! You especially do not want to get sucked into a “sign-up now”, get your engagement photos, wedding announcements, wedding photos and find out after the engagement session you are stuck with a photographer you don't want. Take the time to get to know your photographers, and only commit to small bites in the beginning. You do not want to find yourself stuck with a photographer you hate and the only way out is to buy out the contract for the wedding.


4) Remember you don’t want every photo. - In this digital age with a lot of instant gratification it is easy to think you want every photo that gets snapped. Some of them are just going to be bad, a setting was wrong, somebody sneezed or a random photo bomb occurred. The other thing is a lot of them will be very repetitive. Trust your photographer to be able to show you a selection of the best images, after all that is what you are hiring us for.


5) Make sure the photographers have an opportunity to see the venues. - Even if the photographers have worked in that venue before, your ceremony and decorations are going to be unique. They need an opportunity to see your style and what your ceremony will be like. Having them present at your rehearsal is a great idea.


6) Once the photographer is chosen be sure they coordinate with the wedding planner. - A professional planner is a good idea to help everything run smoothly, but whoever is coordinating your wedding should meet with the photographer so they can have a chance to plan your event in a manner that will not interfere with either the event or your capturing memorable images of it.


7) Ask your guests to refrain from shooting. - Your guests are there to share your day with you. If they are trying to shoot photos, it is disruptive, they are not really having the opportunity to share in your day, and it limits the photographs your professional can get. Just imagine every photo of your guests is nothing but a sea of cellphones and you will begin to see what I mean.


“The bitterness of poor quality remains long after the sweetness of low price is forgotten.” – Benjamin Franklin


Follow Us


Sunday, January 26, 2014

Creative Lighting with Color

It is possible to use light as an element of creation in the production of a photo. Besides varying the position of the flashes or other lighting and their intensity, one can also change the color of the lighting so that the colors in the photo appear differently from how the subject appears to the eye without the lighting. To change the color of the lighting one uses lighting gels (also called colored gels). There are hundreds of lighting gels on the market each a different shade of a different color so that the lighting effects one can produce are endless. The aim is to produce a photo that is unlike what you can see with your eye. This particular photo was inspired by the artist Picasso's use of color, although you could take cues from any number of painters and artists.

For this setup I used three flash units with gels. You could experiment with using only two flash units, but the colors may not turn out as intense, and you run the risk of there being shadows where you do not want them. Of course there is nothing keeping you from using more flash units. By all means you should experiment with the lighting and the color of the gels to achieve what you wish to achieve with the photos. You will want an area where you can control the ambient lighting such as a studio as ambient light can affect the colors you wish to produce in the photograph. A way to dim the lights to just the point where you can see what you are doing is also desired. If you are not shooting in a studio, but say in a living room of a house, sunlight streaming in from a window can have dire effects on what you are trying to achieve with the colors as can light from street lights if you are shooting at night. If you do not have a studio available, you should try to find a windowless room in your home, or a room where you can put up heavy curtains to block out light. Use of a tripod as this will give more control if you are using a continuos light source. Camera movement could affect what you are wanting to achieve in undesired ways. A remote release is also advised to minimize camera movement. If you do not have a remote release you can use the camera's timer to keep movement to a minimum. Once you are setup, you will want to experiment with your camera settings to see what you can do. 

This particular photo was taken with a Canon 7D with an EF-S 18-200mm lens set to 50mm. The ISO was set at 400 and the aperture was set at f8. The shutter speed was at 1/200th of a second while white balance was set to 5600k. It was saved in the RAW format. Three flash units were used. A pair of 430EX-IIs were used to light the background, one from camera left, and one from camera right. Both used yellow gels. The subject herself was lit by a single 580EX-II at a 90 degree angle with a blue gel. You can experiment with the colors of the gels to get the best color as not all gels are created equal. With hundreds of gels on the market there is no reason you should not be able to achieve your desired color in a photograph. You can also experiment with the position of the flash units and the type. Using different flash units in different positions you can achieve different effects. By all means experiment with your camera settings.

Lighting with lighting gels is an area where one can feel free to experiment, and it can be argued that you are not so much a photographer using lighting gels as you are an artist. After all you are not recording the image as it appears to the naked eye, but attempting to produce something the eye does not see, something that can only be captured in the instant of flash units and the "click" of a shutter. To get ideas I recommend looking at the artwork of famous painters such as Picasso in his Blue Period for inspiration. Painting your subject, background, or both with colored light opens up a world of creativity.


Follow Us


Sunday, September 29, 2013

What is High Speed Sync?

1/3200th w/ High Speed Sync

High Speed Sync is a dedicated flash camera function that allows the photographer to use flash in situations where the lighting requires a shutter speed that would otherwise prohibit the use of flash. 

Ok that statement is a bit high on the techno speak, so lets look at it a bit differently. In most flash photography shutter speed is pretty irrelevant, the lighting situation is such that the ambient light leaves little or no impression on the sensor and the flash dictates both the exposure and acts to freeze the action. In photography without flash the aperture is used to control depth of field while the shutter acts to control action - a slow shutter shows motion blur and a fast shutter freezes objects in motion. With flash photography even in cases where you are blending with ambient light the flash will still have a tendency to freeze action. This happens because the short, high intensity burn of the flash acts as the effective shutter speed, usually somewhere around 1/1000th of a second depending on flash output.

I mention this because it can be easy to forget if you do not regularly shoot in situations where it is necessary to shoot outside of the cameras sync speed. When the flash is freezing your action for you it is easy to forget that the flash does not function with the camera at shutter speeds above the camera sync - for most cameras this will be 1/250th of a second, though for the EOS 6D that speed is 1/180th. To find your Camera’s sync speed you will need to check the camera's user manual.

Ok since we have established that flash freezes action and it is therefore not necessary to use the shutter to do that then why do you need to be able to use flash with a shutter set above the sync speed? Well sometimes the ambient light you are blending with is just too bright for your camera’s sync speed, this generally means you are shooting in sunlight. 

Second Curtain Closing
To understand this a little better it lets take a moment to look at how the shutter functions. At and below sync speed the first curtain of the shutter opens completely before the second curtain starts to close, this allows the entire sensor to be exposed at once. At speeds above the camera’s sync speed the second curtain starts to close before the first curtain has fully opened, at higher speeds only a partial strip of the sensor is being exposed at any given moment.

High Speed Sync changes the duration of the flash burn. Instead of the flash firing once the first curtain has cleared the shutter the flash fires a series of pulses and burns for the entire duration of the shutter action. This function allows the flash to be lit for every section of the sensor without the second curtain blocking part of the sensor which happens if the flash fires a single burst.

The Image at the top of the post was photographed using High Speed Sync. That image was taken at 1/3200th of a second, well out side of the camera’s normal sync speed. The next two images show the scene without flash, the first at 1/180th of a second which exposed the apple nicely but completely blew out the sky, the second at 1/3200th which was the speed needed to get proper exposure of the sky but it crushed the apple in shadow leaving it and the leaves quite dark. It would be possible to create an HDR of this scene, but for HDR you really need to be shooting still life. High Speed Sync can create the image in a single exposure and allows blend flash with sunlight, something the regular sync speed does not allow.

1/180th no flash
1/180th no flash

1/3200th no flash
1/3200th no flash

* Note not all flashes and cameras support High Speed Sync though it is available on Canon, Nikon, and Sony Alpha lines, as well as being supported by some third party flashes. You will need to consult both your camera and flash manuals to see if High Speed Sync is an option for you.


Follow Us


Sunday, September 15, 2013

Photographing Sports


Photographing sports can be challenging for the beginning photographer. A couple of different approaches can be used to help get great images. In An 18% Grey World I wrote a bit about how the camera makes the decisions it makes, if you have not read that post yet it would be good to look over it now. When approaching sports photography there are three different approaches you can use.

Your first option is full automatic letting the camera make all the decisions on exposure. If your camera does not have a sports setting in its full auto array this tends to be the worst of the three options. Even in bright sun the camera will operate with lower shutter speeds so that it can keep the ISO low and the Aperture high giving the camera the biggest depth of field. In general full auto will always have motion blur, a lot of motion blur as it will keep your shutter between 1/60th and 1/250th of a second. The sports setting, if your camera has it, will help do a better job as it will tell the camera to try and keep the shutter at 1/250th or higher, greatly reducing the amount of motion blur. This will be your best option if you are using a point and shoot camera.

The next option is to use shutter priority or Time Value. Many photographers recommend this approach as the camera tries to maintain your preferred shutter while still judging exposure. It is important to remember that while you set the shutter this is still an automatic setting for the camera, many cameras will only give preference to the shutter speed you have selected. This means that while you may have told the camera you want a 1/500th shutter it may drop you to 1/60th if the meter tells the camera it is 3 stops under exposed, this can be very problematic especially if the camera is spot metering the scene, but even in evaluative metering the camera can still drag your shutter speed down to far for shooting sports. Some cameras allow you to turn off the Safety Shift or switch it to shifting the ISO to prevent the camera dragging the shutter.

My preferred option is shooting in full manual mode, this insures that I can keep the shutter speed high enough to capture the motion the way I want to show it. There is a bit more work associated with shooting this way if you are shooting in a changing light environment. However unless your subject is moving in and out of bright sun and extremely harsh shadows the change in exposure will only be a couple of stops. The other time you can see a big shift in light is when photographing a game that starts before sunset and continues into the night. In this latter case the exposure shift is much more gradual and is easy to compensate for as long as you pay attention to your shooting conditions. 

A brief run down of how I approach this shooting situation. If I am shooting sports in daylight I set the camera to f8 ISO 800. In bright sun this allows me a shutter speed of 1/1600th (Sunny 16) certainly fast enough for hand holding the camera at any focal length and freezing most action. Even if clouds are moving in and out from in front of the sun I can shift two stops in the shutter and still maintain a shutter speed of 1/400th Again this will allow me to hand hold a telephoto lens and still freeze most of the action. When shooting at night I set the camera (EOS 7D) to ISO 6400 and the shutter to 1/500th with the aperture set to the maximum aperture for the lens at its longest focal length. Many lenses have a variable aperture which will be something like f3.5-5.6. For this kind of lens I would set the Aperture to 5.6.

A few other things to keep in mind. 
  • Blur becomes much more apparent the longer the lens you use. If you are shooting with an 800mm lens then the motion blur of your subject will become more apparent and you will need a faster shutter to get tack sharp images. 
  • The same holds true for camera shake. As a general rule to eliminate camera shake the shutter speeds needs to be equal to or faster then your lens length. A 60mm lens can be hand held at 1/60th of a second, an 800mm lens can be hand held at 1/800th. An image stabilized lens will generally get you one stop of shutter speed, meaning an 800mm IS lens could be hand held at 1/400th.
  • Post production of RAW images can recover 3 or more stops in your image provided you don’t have blown highlights. What this means for shooting sports at night is you can recover a lot from what the camera considers under exposed. As long as you do not have an extreme amount of clipping in your shadows shoot the faster shutter speeds to eliminate blur and bring the images back in post.
  • If you can not shoot in RAW set the camera’s auto-light optimization to high and it will do the same thing for you by recovering shadows as it saves the image to Jpeg, allowing you to favor shutter over “correct” exposure.

* This post is written using the terms Canon uses, most manufactures have these options though sometimes under a different name. 


Sunday, September 8, 2013

Canon 580EX-II - Equipment Review

Canon 580EX-II
Canon 580EX-II

The 580EX-II was the top of the line Canon Speedlite until the release of the Canon 600EX-RT. For many shooters the release of new equipment opens opportunities for them that had not been practical before as older equipment re-enters the market at 1/3 or even 1/4 of original cost. For many shooters this will allow them the option of adding a powerful E-TTL II flash to their kit that can also function as a master controller for their existing 430EX-II or other Canon Speedlites. 

Many other shooters will be wondering if the 600EX-RT is a better option. Lets take a brief look at that first. Both the 580 and the 600 are capable as functioning as an optical master for the existing Speedlite lines, while the 600 is capable of controlling 5 flash groups and the 580 only controls 3 in optical mode the 600 is also limited to 3 flash groups. The rational behind this limit was probably limit of the older flashes to groups A thru C, however it would have been nice to have the option to use older units in those groups and use 600s in the D and E group in an optical controlled system. The short of it is to gain the added advantage of 600 series flashes at this point in time all flashes have to be 600 series making that set-up much more expensive then using a 580 master with other 580 and 430 units as slaves. Used 580s are now comparable in price to new 430s which makes adding a used 580 to the mix an attractive option.

For shooters that are already using cameras like the 60D and 7D which offer master controller function through the pop-up flash paying an additional $550 for a new 580EX-II was probably not an attractive option. Now you really should consider picking one up used in the $200 dollar range, this is why. The 60D and similar model cameras while capable as acting as a master controller were limited to flash groups A and B by using a 580 as your master controller you now have access to group C as well creating much greater freedom when using speedlites for 3-Point Lighting. For the higher end cameras that already supported all three flash groups the big advantage to having an on camera 580 is when you are controlling flash groups with the camera oriented to portrait format. The common problem the pop-up unit encounters in shooting in this fashion is putting some of the off camera flashes into the shadow of the lens which prevents them from firing. The larger surface of the 580 unit along with the ability to orient it in different directions can allow all of the flash units to easily see the master unit. 

If you are using a higher end camera like the 6D a pop-up option is not available and a 580 is a very affordable option. While it is true that ST-E2 units can be purchased new in the same price point as used 580s, the big advantage of a used 580 is that it gives you one more flash unit. Even with this unit mounted on camera it can provide fill light or be used as a Bounce Flash.

The 580EX-II is still a very relevant option for most shooters. It is a powerful reliable choice and when it comes to the use of other optical units it’s price point makes it a superior choice to the 600 Series.


Follow Us


Sunday, September 1, 2013

Blending Flash with Ambient Light


Lighting Set-Up
Lighting Set-Up
Mixing strobes with existing light seems to be one of those things that confuses many photographers. This is most likely due to the fact that two sets of photographic rules are at play when blending flash and ambient light. The first set is what natural light shooters tend to live and die by, the “BIG 3”. If you have read my earlier blog post you know that I tend to look at this set of rules as being very malleable. The second set of rules come out of studio lighting, where light is controlled by light, or by aperture if you are working with a set of strobes that are not adjustable (but even in this case you can control flash power by distance to the subject or the use of neutral density gels and not need to use on camera settings).

So where does the confusion come in? When a photographer is shooting using all natural light where they have very little or no control over the light, such as landscapes, their only recourse is to adjust camera settings. If the scene is already properly exposed and the photographer wishes to adjust shutter, they then have to adjust aperture or ISO to get an equivalent exposure. In the days of film they were really stuck with adjusting aperture or wasting the rest of a roll of film to change ISO/ASA.

When shooting under studio strobes shutter speed is almost meaningless. A simple way to demonstrate this is to set a camera up in a room on manual setting. Set the ISO, shutter aperture and flash for the exposure you want when the lights are turned off. Turn the lights off take a picture with flash and then adjust your shutter - just your shutter - and take a second image. As long as both shutter speeds are within your cameras sync speed there will be no difference in the two images. This is because flash photography has an effective shutter speed which is the burn time of the flash, in most cases somewhere around 1/1000th of a second. This effective shutter is much much faster then even the cameras fastest sync speed (for most Canons 1/250th) As long as you understand this you understand how to mix flash with ambient light.

The how too blend flash and ambient is actually quite simple. Set your scene, set your camera for an ISO you are comfortable with and set your aperture to create the Depth of Field that you wish to have and set the shutter to your maximum sync speed. Once this is done set your flash output to properly expose your subject (depending on your flash this can either be done with output, neutral density gels, or distance to subject). At this point when you release the shutter you should have a properly exposed image. If you do not adjust your flash power accordingly. 

Once you have a properly exposed image you can then mix ambient light in simply by slowing your shutter speed. Remember from the lights turned off room exercise above that shutter speed does not effect flash exposure, so the Big 3 methodology does not apply to the exposure from the flash and you do not need to adjust aperture or ISO as you change the shutter(this is where people get confused). By slowing or “dragging” the shutter all you are doing is allowing more ambient light to balance the areas of the image that are not being exposed by the flash.

So why do we blend flash and ambient light? There are several situations which can call for this, the most common is when more light is needed then is available yet we do not wish to loose the ambience such as in a club. Another common place to use flash and ambient is when photographing a person at night and wishing to have a city scape behind them visible as well. This is similar to the first but the flash is needed because the person would not expose at all, they would simple be a shadow blotting out the city lights. Another case is to freeze action, such as bullet photography, the flash is used so the bullet can be frozen in the frame and the longer shutter allows the rest of the scene to also be exposed. Another reason to add flash is to create shadows, in the sequence below you can see that the room is very evenly lit and by adding flash I added shadows which creates depth in the images. In actuality blending flash will be used for multiply reasons in the same image.

So now we have covered the theory, lets look at the nuts and bolts of what I did for this exercise and how it affected the images. Photographed at the top you can see how I set the camera and flash in relation to the scene. I treated the piano as the subject of the image, I placed the 600EX-RT on 1/4 power, into a 24” softbox, 6 feet from the piano. The camera was the Canon 6D with the 24-105 f4 L set to 24mm. The ISO was 400 and the aperture was f4 for all of the images in the following sequence the only thing that changes is the shutter speed which is listed on the images.


1/180th

1/125th

1/60th

1/30th

1/15th

These last two images below show the scene, the first with the camera set to take a flash exposure but no power to the flash, and the second with the camera set to take the image just with ambient light. The Canon 6D sync speed maxes at 1/180th which is why there is a discrepancy between the first image in the sequence above and the image here for flash with the flash turned off. In situations where you need a faster sync speed Hi-Speed Sync can be used to get speeds above your cameras sync speed. (This will be covered in a later blog.) For this example I allowed the camera to set the default shutter sync for the 1st image. I also did not correct for Color Balance, the camera was set to Flash which is why the total ambient light image has a yellow cast. I did this deliberately, in the sequence the competing colors make it a little easier to spot how much ambient light is effecting exposure. If you use AWB it will set to flash when a flash unit is attached to the hot shoe so the area exposed by the flash is closer to white. If you use gels to match your environment you will need to set your cameras white balance accordingly with the camera’s custom white balance settings. The exception to this is when using Canon CTO gels with the 600EX-RT. The 600 has a sensor which allows it to correct white balance to the Canon CTO gel being used if the camera is set to AWB. I have not explored this function yet so I am not sure how well it works. It also only works if the flash is mounted in the hot shoe.

No Flash 1/250th

Ambient Only 1/15th


So that is the basics of mixing flash with ambient, like color balance the only way to really learn this skill is through practice. Depending on your set up it is possible that if you are mixing a lot of ambient light you would need to step the flash power down slightly. Do not be afraid to experiment once you have a good grasp on how the toe exposure models work and how well they blend.


Follow Us


Sunday, August 25, 2013

Bounce Flash


So what is Bounce Flash? Specifically, bounce flash is any flash that is bounced off of a surface to illuminate the subject, so a mono-block firing into a reflective umbrella is a type of bounce flash. In more common usage bounce flash is the use of an on camera speedlite* which is being bounced off of a wall or ceiling to light the subject. 

A lot of the blog posts I have written on technic have been aimed towards the serious enthusiast or pro who has invested in a wider array of gear and has the option of shooting multiple light set ups or using other modifiers. Bounce flash is a technic which is available to any photographer using a camera that has a hot shoe supporting the use of a speedlite, who has also purchased a speedlite with a swivel head. The minimal need for equipment and the number of mid range cameras, like the SX-50, that offer a hot shoe as an option make this an ideal technic for anybody who wants to do photography on a budget, or who does a lot of photography on the go and wants to be able to travel light.

Apart from the relative in-expense of bounce flash it is also a relatively easy technic to get the hang of on most modern cameras. The majority of newer cameras offer some type of TTL metering. TTL stands for Through The Lens and the camera actually triggers a very brief pre-flash which lights the scene that the camera then uses to judge over all flash power for exposure of the image. This is the equivalent of setting the flash on automatic. This can be used in conjunction with the cameras automatic settings meaning that this technic is available even to very inexperienced photographers.

In general I recommend setting the camera to manual so that you have creative control over ISO, shutter, and aperture while leaving the flash to calculate the needed flash power. As a general rule bounce flash will be used in “Run and Gun” situations where the distance between the flash and the subject is changing and the flash output will have to be adjusted to match. This is what the TTL is designed to do, while it is possible to use this technic without TTL it then becomes more of a walk and gun situation and requires a lot more skill on the part of the photographer to be able to constantly adjust flash output to match the changing scene.

Bounce Flash is one of those technics where there is no specific “right” way to do it, however there is quite a lot of flexibility available to sculpt the light even when using TTL. What follows is a series of four images where the only change is the direction the bounce flash is being fired. All of these images where taken with the Canon 6D set to ISO 200, f8 and 1/180th with the 24-105 f4 L set to 85mm and the camera located 4 feet from the subject. The flash used was the Canon Speedlite 600 EX-RT set to ETTL. The E in ETTL stand for evaluative and refers to a Canon specific algorithm used to determine exposure. Nikon has a similar brand specific algorithm which is designated with an I in their ITTL flash units.

Flash bounced off Ceiling
Flash bounced off Ceiling 


Flash bounced off Wall Behind Camera


Flash bounced off Wall Camera Left


Flash bounced off Wall Camera Right


Looking at these four images you can see that there is a lot of flexibility in how the light falls on the subject. The primary thing to keep in mind when using this technic is where the light is coming from. In many situations your environment may dictate that by only providing one or two suitable surfaces to reflect the flash off of. It is important to remember that the flash will pick up the color of what ever surface it is reflected off of. In many cases this kind of color cast can be corrected in post as the flash will be lighting the subject and background both and the color cast will be applied to the entire scene. But when possible us a neutral surface like a white wall or ceiling.

If we look at this series a little more in depth, comparing the images where the light was bounced off of the ceiling with the image where the light was bounced off of the wall behind the camera we can see that both images are lit similarly but the light from behind the camera has a much softer quality. Similarly if we compare the images where the light was bounced from camera right and camera left we can again see that the light from camera left is softer. In both cases this is because the surface the light is reflecting off of is farther away allowing the light from the flash to spread out more. 

If you remember in this blog post we briefly looked at bounce flash in the discussion of on verses off camera light quality. In the second and third images on that post the hardness and softness of the bounced light was modified not by changing the distance of the light to the reflective surface but by changing the flash from wide angle (soft light) to telephoto (harder light). The wide angle - telephoto settings in the flash were originally designed so that when used in conjunction with different focal length lenses the flash would only light what was actually in the frame. This allowed the flashes to light subjects that were far away as the output was directed more to the front and not spread out. However for Bounce Flash it gives us more options for sculpting the light. another handy tool, particularly if you have an assistant is a piece of white foam core or other reflector. This allows you to position a reflective surface wherever you want. This is a very inexpensive way to overcome environmental obstacles.

So now you have an idea of what bounce flash is, but the way to really get an understanding of this technic is to just go out and shoot a lot, change the angles the flash is being bounced the distance to the subject, how much in front or behind the reflective surface is and you will quickly begin to understand all the potential this technic has for sculpting light. This method really opens up a lot of creative shooting options for events and parties. 


On Camera Flash for comparison

* In this post I am using the term speedlite as short hand for any on camera flash that is mounted in either a hot shoe or cold shoe and triggered by the cameras shutter.


Follow Us